
If you’ve ever watched rabbits devour your vegetable beds overnight, had small pets squeeze through flimsy fencing, or struggled to fit premade panels around a curved garden, you know how frustrating standard garden fencing can be. For two years, I cycled through cheap plastic barriers (chewed through in days), wooden pickets (rotted after one winter), and overpriced custom panels that didn’t match my garden’s shape.
The fix? A DIY wire mesh garden fence I built in a single weekend—affordable, completely customizable, and tough enough to keep pests out and pets safe. No fancy tools, no professional help, just a design that works with my garden’s curves instead of against it. Below is my no-fluff, mistake-proof guide to building a sturdy, safe wire mesh fence that actually lasts.
Choose the Right Wire Mesh (My Tested Picks & Safety Breakdown)
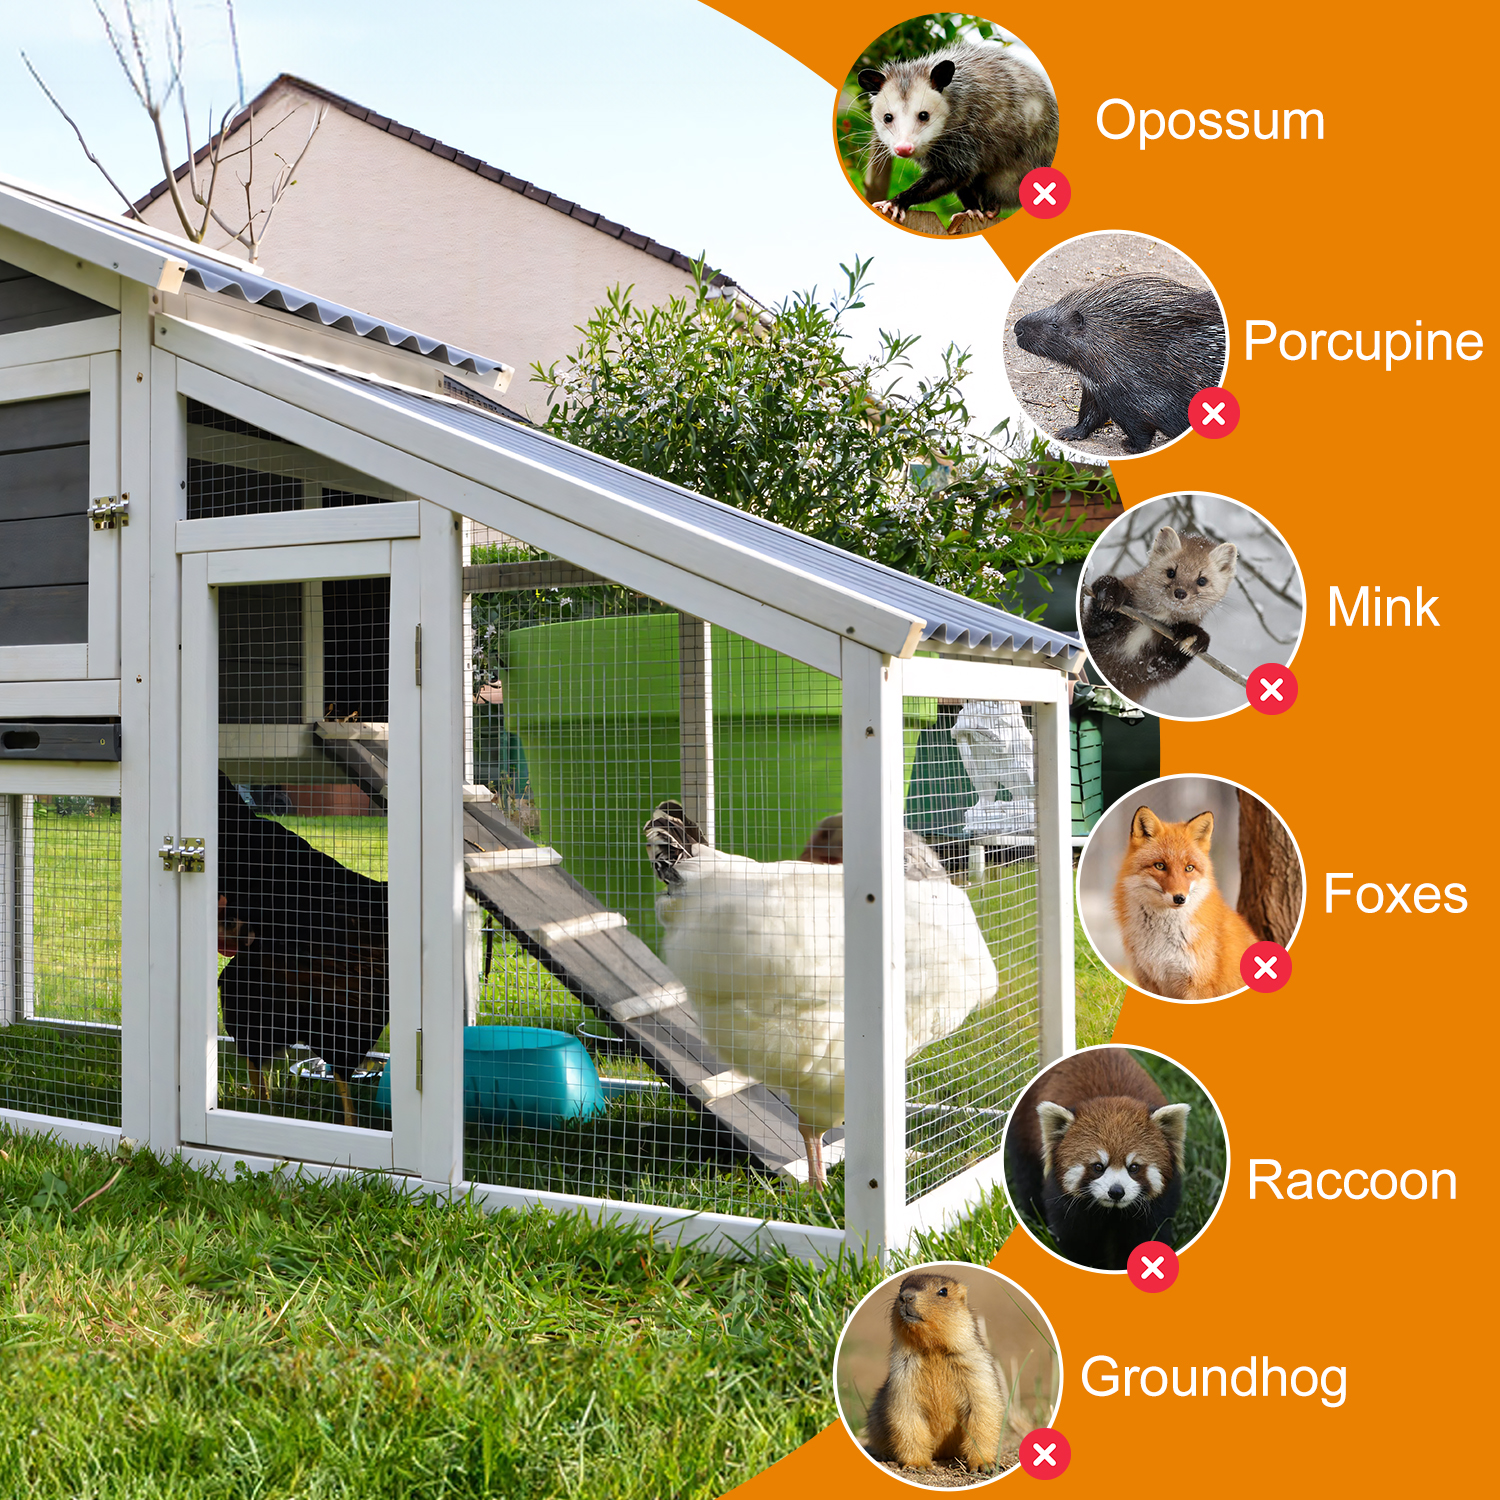
Not all wire mesh is equal—I learned this the hard way when I bought thin, sharp-edged mesh that scratched my hands and let squirrels squeeze through. The right material depends on your main goal, and these are the only three I recommend after months of testing:
your fence safe for little hands and paws. Most DIY-friendly mesh comes pre-cut in rolls, so you can buy exactly the length you need—no waste, no extra work.
| Mesh Type | Best For | Ideal Mesh Size | My Personal Experience |
|---|---|---|---|
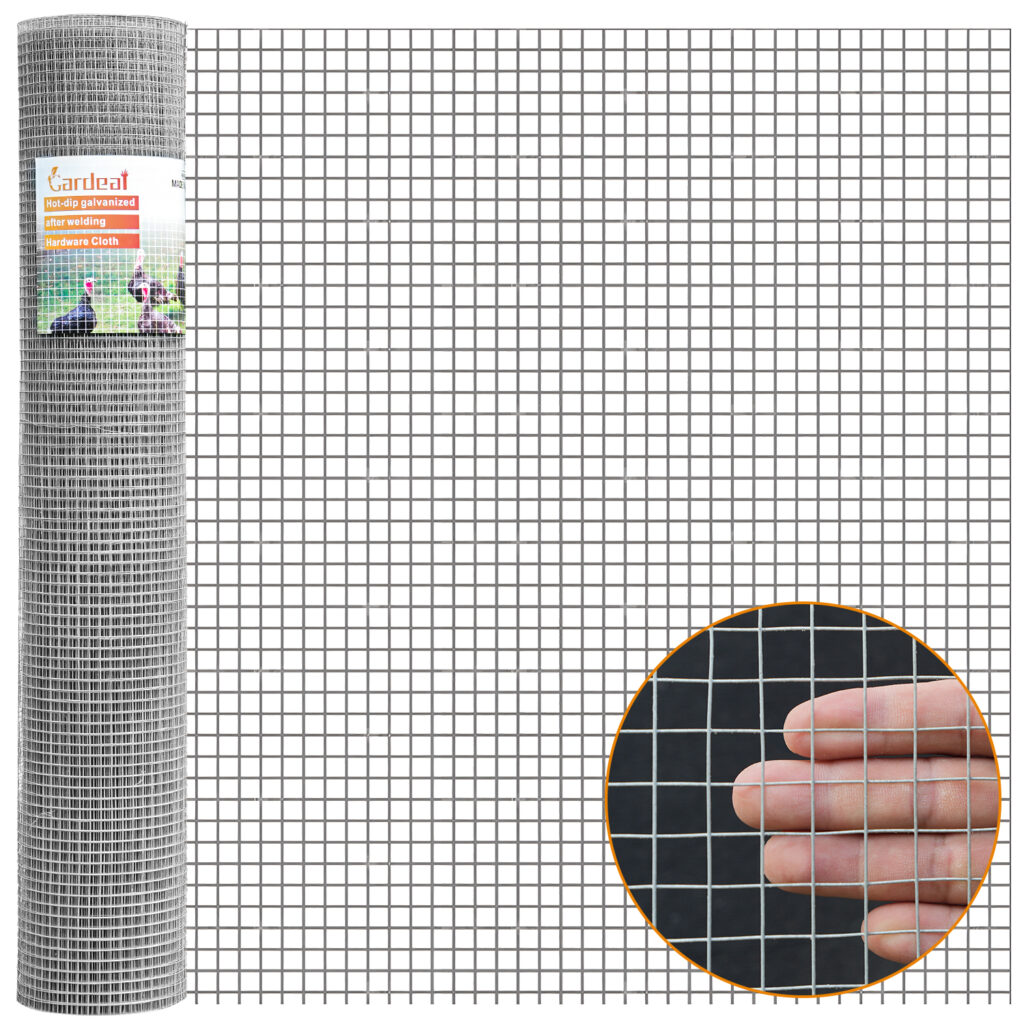
| Galvanized Steel Mesh | Pest control, all-weather durability | 1/2″–1″ | My top pick for the main garden. It’s rust-resistant, blocked rabbits & rodents completely, and held up through rain and snow without bending. I use 1″ mesh—it’s unobtrusive but still secure. |
| PVC-Coated Wire Mesh | Families, pets, visual appeal | 1″ | Softer to the touch (no scrapes for kids/pups), and I chose dark green to blend with foliage. The coating doubles rust protection; mine still looks brand new after 2 years. |
| Welded Wire Mesh | Curved gardens, extra stability | 3/4″–1″ | Rigid but flexible enough to bend around my circular flower bed. Way sturdier than woven mesh, which sagged in wind. |
Critical Safety Tip I Learned:Avoid mesh with raw, sharp edges. My first roll had cut ends that snagged clothes and scratched skin—now I only buy mesh with rounded, finished edges. It costs slightly more but is non-negotiable for homes with kids or pets.
DIY Prep: Tools & Measurements (No Fancy Gear Required)
One of the best parts of this project is that you don’t need a workshop full of tools. I used basic supplies I already owned, plus a few affordable extras. Here’s my exact list, plus the measurement mistake I almost made:
Essential Tools & Supplies
-
Wire mesh roll (galvanized/PVC-coated/welded)
-
Wooden or metal fence posts (I used 4ft wooden posts for a rustic look)
-
Tape measure, level, string line
-
Heavy-duty wire cutters & pliers
-
Outdoor-rated zip ties / U-clamps
-
Post hole digger (or a regular shovel)
Pro Measurement Hack (Fixes My Biggest Mistake)
I first measured only the straight sections of my garden and came up 3 feet short—curves and corners eat up extra mesh.
Rule I now follow: Measure your full perimeter, then add 2 extra feet of mesh for curves, overlaps, and mistakes. Mark your layout with string; wire mesh bends easily, so you can follow natural garden shapes instead of forcing straight lines.
Step-by-Step Installation (Mistake-Proof, DIY-Friendly)
I built my fence alone in 6 hours, and these steps avoid all the errors I made on my first attempt:
Step 1: Set Posts Deep Enough (Wind & Frost Proof)
Dig post holes 2–3 feet deep (3 feet if you live in frost-prone areas—my first posts were only 18 inches deep and blew sideways in a storm). Space posts 6–8 feet apart for stability.
Set each post, level it, then backfill with soil (temporary) or concrete (permanent). I used quick-set concrete for my main garden fence—it set in 24 hours and hasn’t moved since.
Step 2: Attach Mesh Taut (But Not Too Tight)
Unroll the mesh along the posts and pull it snug—don’t over-tighten, or it will tear in heavy wind.
I used outdoor UV-resistant zip ties (cheaper, faster, and adjustable) instead of permanent clamps. If I need to expand my garden later, I just snip the ties and reposition the mesh. For extra height, overlap two mesh rolls by 6 inches and secure them together—no custom sizing needed.
Step 3: Secure the Bottom (Non-Negotiable for Pest Control)
This is the step most DIYers skip—and I regreted it at first. I left the bottom of the mesh above ground, and groundhogs dug under it within a week.
Fix: Bury the bottom 6–8 inches of mesh underground, or attach it to a low wooden rail. This blocks digging pests and eliminates tripping hazards, making the fence safer for everyone.
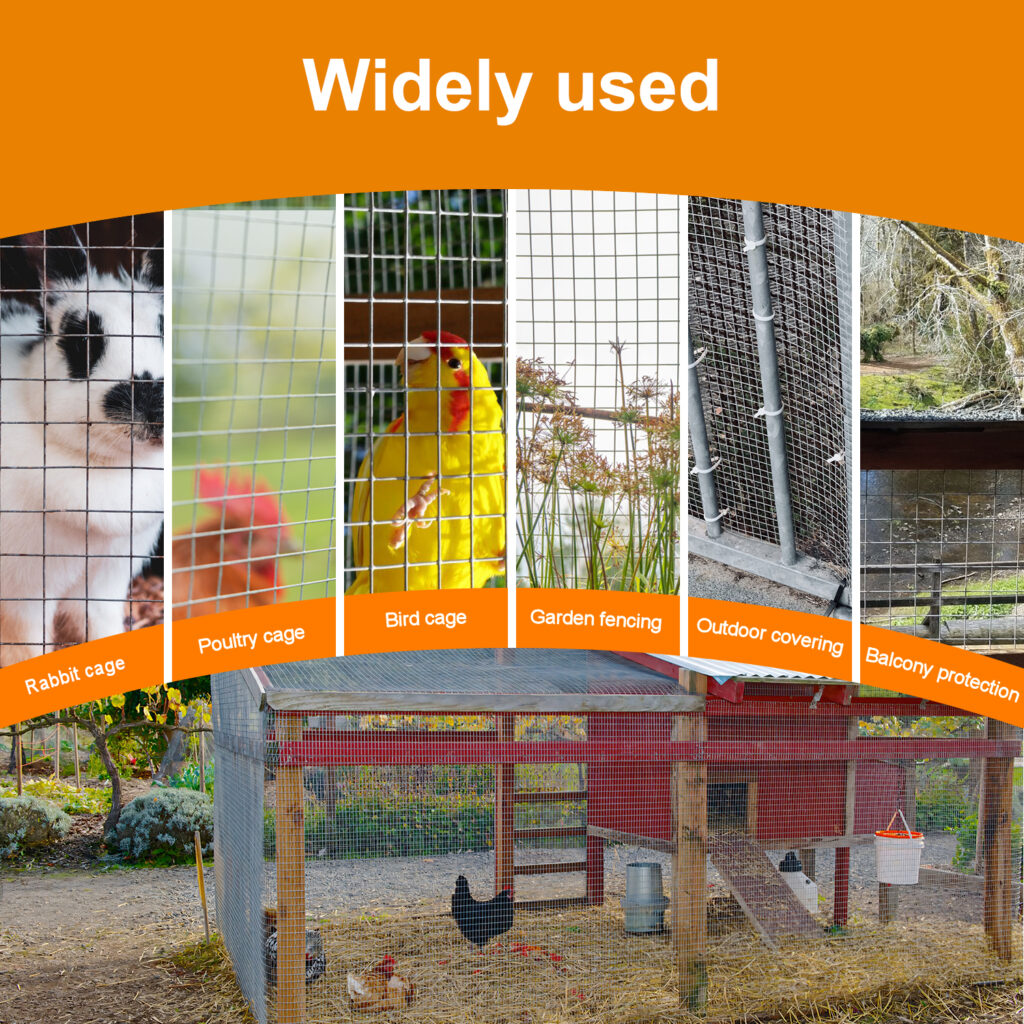
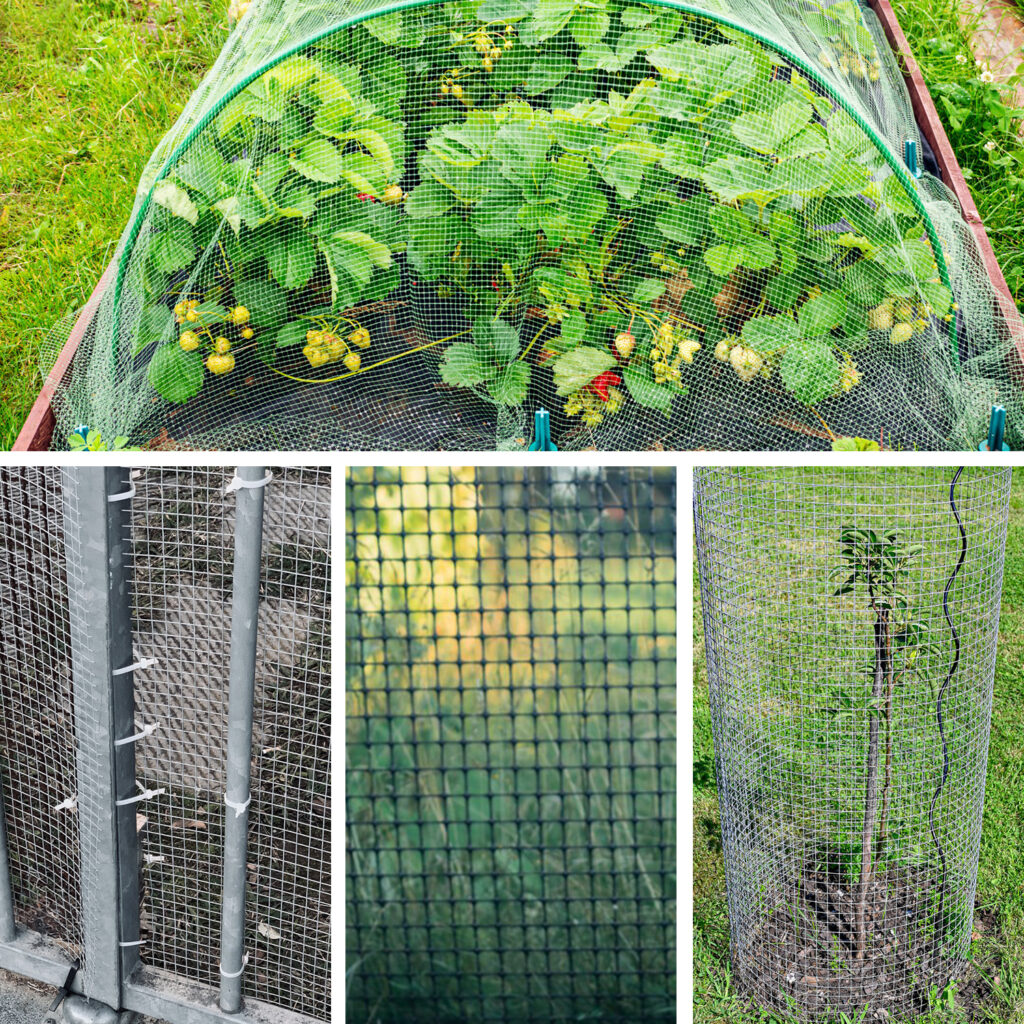
Customize Your Fence (My Easy Garden Styling Ideas)
Wire mesh doesn’t have to look industrial—I turned mine into a decorative feature with zero extra effort:
Mixed materials: Paired mesh with wooden posts for a cozy rustic look that fits my cottage-style garden way better than plain metal panels.
Color match: I painted my galvanized mesh with outdoor matte green paint to blend with shrubs; PVC-coated mesh can also be refinished for a custom look.
Vertical gardening: Hung small hanging planters with succulents and trailing flowers directly on the mesh—added charm without extra supports.
Flexible height: Cut mesh short for a low decorative border around flower beds, or stack rolls for a 4ft tall barrier around the vegetable garden.
Low-Effort Maintenance (Keep It Safe & Long-Lasting)
My wire mesh fence has needed almost no upkeep, unlike my old wooden and plastic fences. Here’s my simple routine:
-
Inspect every 6 months: Check for rust (galvanized/PVC mesh barely rusts) and touch up with rust-resistant paint if needed.
-
Tighten fasteners: UV zip ties can loosen over time—snip and replace loose ones in 2 minutes.
-
Trim overgrowth: Vines and branches can tear mesh if left unchecked; I trim plants growing through the mesh every few months.
-
Adjust anytime: Expanding the garden? Snip ties, reposition mesh, and reattach—no demolition required.
Final Thought: Better Than Premade Fencing, For Half the Cost
A wire mesh garden fence isn’t just a budget-friendly DIY project—it’s a solution that fits your garden, not the other way around. After two years, my fence still looks great, keeps pests and pets safe, and cost me 70% less than custom premade fencing.
Whether you’re a first-time DIYer or a seasoned gardener, this project takes a weekend or less to complete. You’ll end up with a safe, functional barrier that adds subtle charm to your outdoor space—no compromises, no headaches, just a fence that works as hard as your garden.